In today’s fast-paced world, many of us are seeking clean, nourishing, and traditional alternatives to refined and processed foods. One such ancient supergrain that’s making a powerful comeback is ragi, also known as finger millet. Packed with three times more calcium than milk, ragi is a nutritional powerhouse with high levels of fiber, iron, amino acids, and antioxidants.
Despite its incredible health benefits, ragi often remains underutilized in modern diets. But it doesn't have to be that way. If you're looking to switch to a healthier lifestyle or simply want to explore gluten-free baking, this ragi bread recipe is the perfect place to start.
Not only does baking your own bread give you full control over ingredients, but when you use ancient grains like ragi, you're embracing a food culture rooted in wellness and sustainability. This easy, no-fuss ragi bread is soft, naturally gluten-free, and ideal for everyday meals—from breakfast toast to sandwich bread.
Why Bake Ragi Bread at Home?
In a world of ultra-processed carbs and store-bought loaves packed with additives, baking your own ragi bread not only gives you control over what goes into your body but also allows you to tap into the incredible benefits of this ancient Indian superfood.
This blog will guide you through:
- The key nutritional benefits of ragi bread
- A step-by-step ragi bread recipe that’s easy and foolproof
- Practical baking tips and tricks for perfect results
- How ragi supports gluten-free diets and blood sugar balance
What is Ragi Bread?
Ragi bread is a gluten-free alternative to traditional wheat bread, made using ragi flour (finger millet flour) instead of refined grains. When combined with psyllium husk for binding and texture, and proofed with dry yeast, it transforms into a hearty loaf that’s delicious and nutritious.
This ragi bread recipe uses wholesome, natural ingredients and avoids artificial emulsifiers or preservatives. It's soft, mildly nutty, and perfect for toasts, sandwiches, or just warm with a dab of ghee.
Health Benefits of Ragi Bread
Let’s look at why ragi bread deserves a spot in your weekly menu:
1. Naturally Gluten-Free
Ideal for those with gluten sensitivities or celiac disease.
2. Rich in Calcium & Iron
Ragi contains high levels of calcium—perfect for bone health—and non-heme iron, making it a great option for vegetarians.
3. Supports Blood Sugar Control
With a low glycemic index (GI), ragi digests slowly, preventing blood sugar spikes.
4. Boosts Gut Health
This ragi bread recipe includes psyllium husk, which adds fiber and supports digestion and bowel regularity.
5. Heart-Healthy
Ragi is packed with antioxidants, amino acids, and essential fats that promote heart health and reduce bad cholesterol.
Ingredients (For One Loaf)
- Ragi Flour – 214g (1½ cups)
- Psyllium Husk – 14g (3 tbsp)
- Instant Dry Yeast – 6g (1½ tsp)
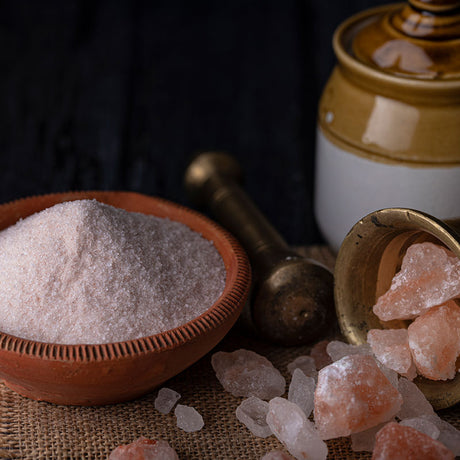
- Himalayan Pink Salt – ½ tsp
- Jaggery (powdered) – 2 tsp
- Oil – 2 tbsp
- Warm Water – 2 cups
- Milk (for brushing) – as needed
- Oats or Mixed Seeds – for topping
- Butter – to glaze after baking
Note: Use standard measuring tools and ensure your yeast is fresh for best results.
Step-by-Step Ragi Bread Recipe
Step 1: Dry Mix
In a large mixing bowl, combine ragi flour, psyllium husk, himalayan pink salt, jaggery, and yeast. Mix thoroughly using a whisk.
Step 2: Add Warm Water
Gradually add warm water in parts, stirring constantly to form a sticky dough. Use a spatula to mix well.
Step 3: First Rise
Cover the bowl with a damp cloth and let the dough rest in a warm place for 2 hours until it doubles in volume.
Step 4: Shape the Dough
Gently scoop out the risen dough. Shape it with your hands (avoid using a rolling pin) and place it into a greased bread tin.
Step 5: Second Proofing
Cover the tin and allow the dough to proof for another 45 minutes.
Step 6: Prep for Baking
Brush the top of the dough with milk and sprinkle sesame seeds for a nutty crust.
Step 7: Bake
Preheat your oven to 200°C (392°F). Bake for 30 minutes or until a skewer inserted comes out clean.
Step 8: Final Touch
Brush the freshly baked ragi bread with a little butter. Allow it to cool completely before slicing.
Serving & Storage Tips
- Storage: Keeps for 2–3 days at room temperature in an airtight container. Refrigerate for up to a week.
- Pair It With: Nut butter, hummus, fresh veggies, or a drizzle of ghee.
- Toast It: Makes an excellent toast base—crisp outside, soft inside.
- Pro Tip: Avoid using an air fryer or convection oven, as it may result in a hard crust and undercooked center.
Ragi Bread in Indian Wellness Traditions
In Ayurveda, ragi (known as nachni or finger millet) is considered balya—strengthening to bones and tissues. Its grounding and cooling properties make it suitable for all three doshas (Vata, Pitta, Kapha) in moderation.
A study published in the International Journal of Food Science and Nutrition emphasizes the functional benefits of finger millet in combating undernutrition and improving bone density.
Baking Tips for Perfect Ragi Bread
- Use instant dry yeast only: It’s reliable, easy to use, and doesn’t require pre-activation, ensuring a good rise and airy texture.
- Warm water, not hot: Too hot and it kills the yeast; too cold and it won’t activate.
- Psyllium husk is essential: It binds the dough and gives a bread-like texture.
- Let it cool completely before slicing to avoid a gummy texture.
Final Thoughts
Incorporating ragi bread into your routine is more than just a healthy switch—it’s a return to wholesome eating rooted in traditional Indian grains. With this foolproof ragi bread recipe, you get a delicious, functional food that supports wellness from the inside out.